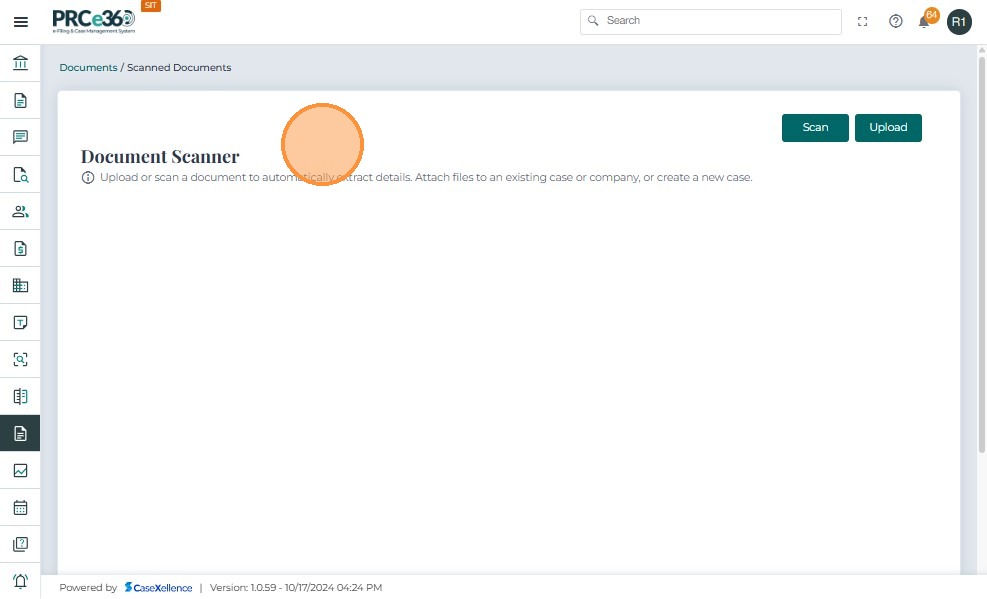
Document Scanner
The Barcode-Based Document Scanning feature allows Records Staff and COS Supervisors to scan hardcopy documents into the system. For automatic processing, documents must have a front page that contains both a barcode and document metadata (such as Document ID, Case/Pre-Case ID, Title, Author, Date Received, and Company Name).
During scanning, the system automatically reads both the barcode and metadata from the document's front page in the scanned image. This information is populated automatically, eliminating the need for manual entry.
Once registered, the scanned document is stored in eDocket and is available for search and retrieval in the same manner as electronically filed documents, ensuring accurate indexing and efficient access to legacy records.
| User Role | Description |
|---|---|
| Records Staff | Scans hardcopy documents and initiates registration in the system. The system reads barcodes from the scanned images. |
| COS Supervisor | Oversees scanning activities, ensures document accuracy, and verifies successful registration. |
Before You Begin
Prerequisites:
- You must have Records Staff or COS Supervisor role permissions
- You must install the CaseXellence Scanning Agent on your local device
- A scanner must be connected to your device
- Document Requirements: For automatic processing, the document's front page must contain:
- A barcode
- Document metadata (Document ID, Case/Pre-Case ID, Title, Author, Date Received, Company Name, etc.)
Important: The front page must contain both the barcode and metadata for automatic processing.
What You'll Need:
- CaseXellence Scanning Agent installed on your local device
- Physical scanner connected and powered on
- Documents with barcode cover pages ready for scanning
Installation and Setup
Step 1: Install CaseXellence Scanning Agent
Before you can use the Document Scanner feature, you must install the CaseXellence Scanning Agent on your local device.
- Download the CaseXellence Scanning Agent installation package from your system administrator or the designated download location.
- Run the installation file and follow the on-screen instructions to complete the installation.
- Ensure the scanning agent is running on your device before attempting to scan documents.
Tip: The scanning agent must be running for the system to detect your scanner.
Steps for Document Scanning
Step 2: Access Document Scanner
- Sign in to the application using your username and password.
- From the left navigation menu, select Document Scanner.
- The Document Scanner page is displayed.
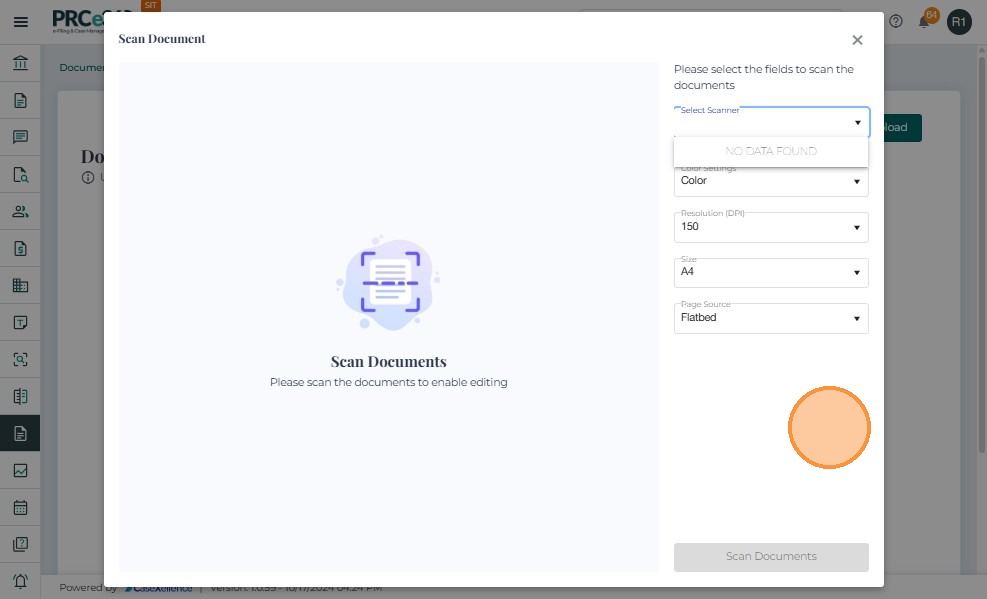
Step 3: Detect and Select Scanner
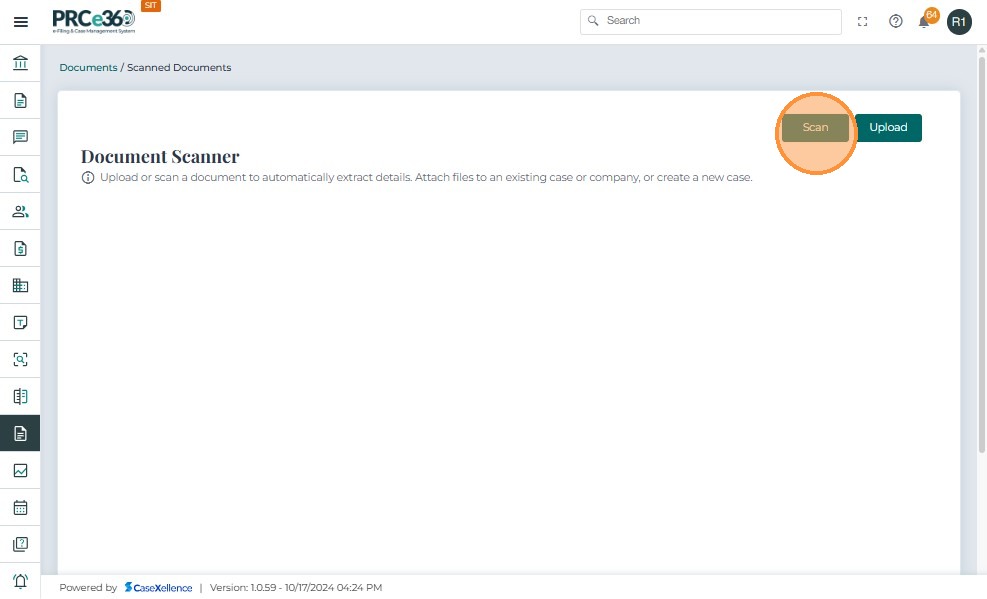
- Click Scan to open the Scan Document window.
-
The system will automatically detect scanners connected to your device through the CaseXellence Scanning Agent.
-
Select the connected scanner from the Select Scanner dropdown.
-
If your scanner is not detected:
- Verify that the CaseXellence Scanning Agent is running on your device
- Ensure the scanner is powered on and properly connected
- Check that the scanner drivers are installed correctly
- Try refreshing the scanner list
-
Verify scan settings such as Color, Resolution (DPI), Page Size, and Page Source.
Step 4: Scan Document
- Place the hardcopy document on the scanner with the front page face-down. The front page must contain both the barcode and document metadata.
Tip: Position the document so the entire front page with barcode and metadata is captured in the scan.

-
Click Scan Documents to begin scanning.
-
Click Scan Documents to begin scanning.
-
The system automatically reads both the barcode and document metadata from the front page of the scanned image.
-
If the front page contains both barcode and metadata:
- The system automatically extracts all information (Document ID, Case/Pre-Case ID, Title, Author, Date Received, Company Name, etc.)
- All fields are populated automatically
-
If the front page is missing the barcode, metadata, or if either cannot be read clearly:
- You will need to enter the Document ID manually
- Manually enter all required document metadata
- Proceed with manual document registration
Step 5: Process Scanned Document
If both the barcode and metadata were successfully read from the document's front page, the system automatically retrieves all information including:
- Document ID
- Case/Pre-Case ID
- Title
- Author
- Date Received
- Company Name
After scanning, you will be presented with the following options to process the document:
Option A: Upload to Existing Docket
- If the system finds a matching docket (based on the barcode and metadata read from the front page, or through manual search):
- Review the automatically retrieved metadata from the front page
- Select Upload to Existing Docket
- Choose the target docket from the list of matching dockets
- Confirm the upload to file the document into the selected docket
Option B: Create New Docket
- If you need to create a new docket for the scanned document:
- Select Create New Docket
- Complete the new docket creation form (metadata will be pre-populated from the front page if both barcode and metadata were read successfully, or you can enter it manually)
- Submit the new docket
- The scanned document will be automatically filed into the newly created docket
Note: Creating a new docket requires appropriate permissions.
Option C: File to Unassigned Documents
- If no matching docket is found in the system (or if you choose not to create a new docket):
- The document will be automatically filed into Unassigned Documents
- You can later assign the document to an appropriate docket when the case is created or identified
- Unassigned Documents can be accessed from the Documents Dashboard
Tip: Documents filed to Unassigned Documents remain searchable and can be assigned to dockets later.
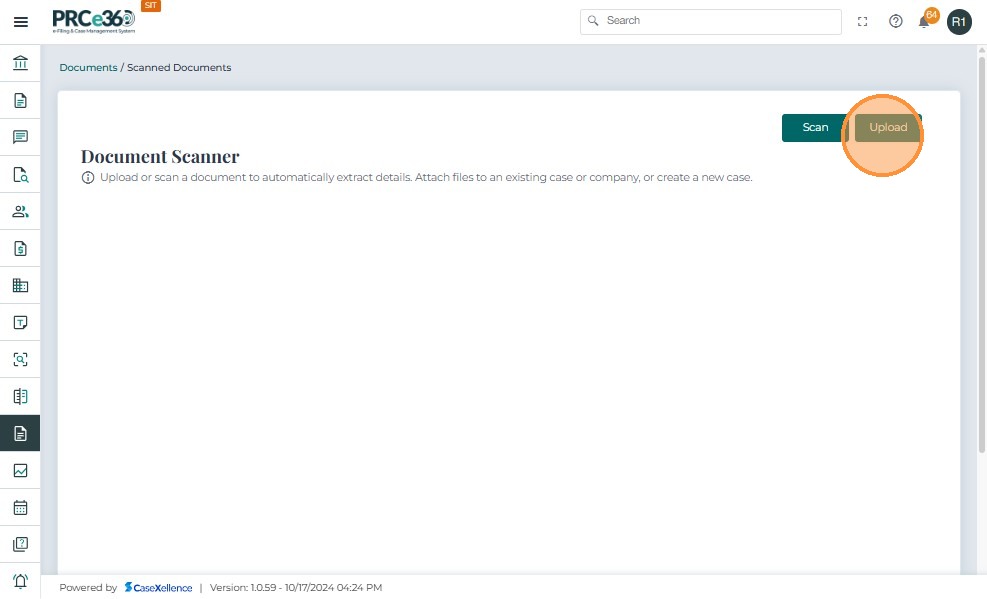
Steps for Document Upload
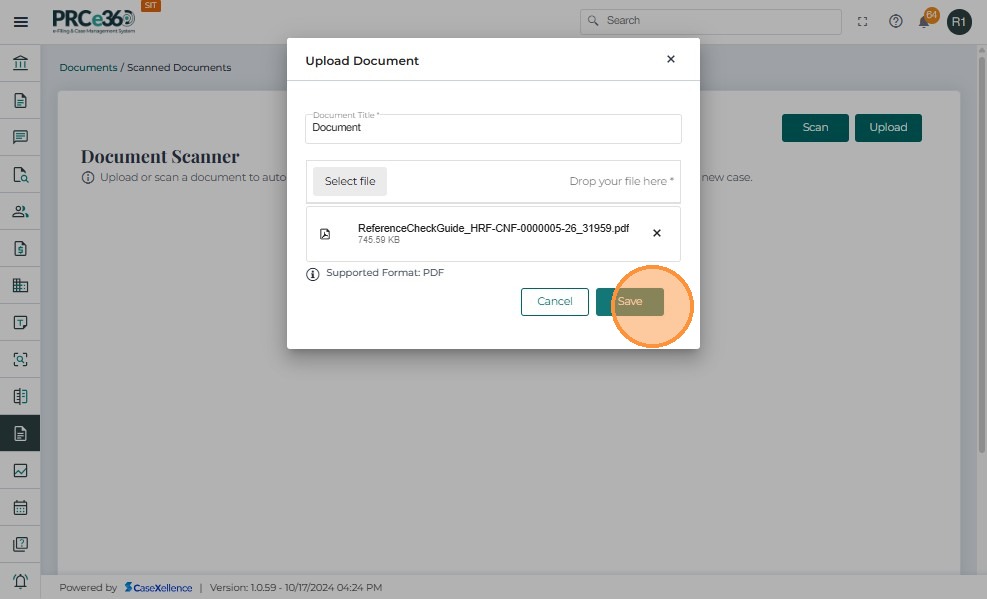
- Click Upload on the Document Scanner page.
-
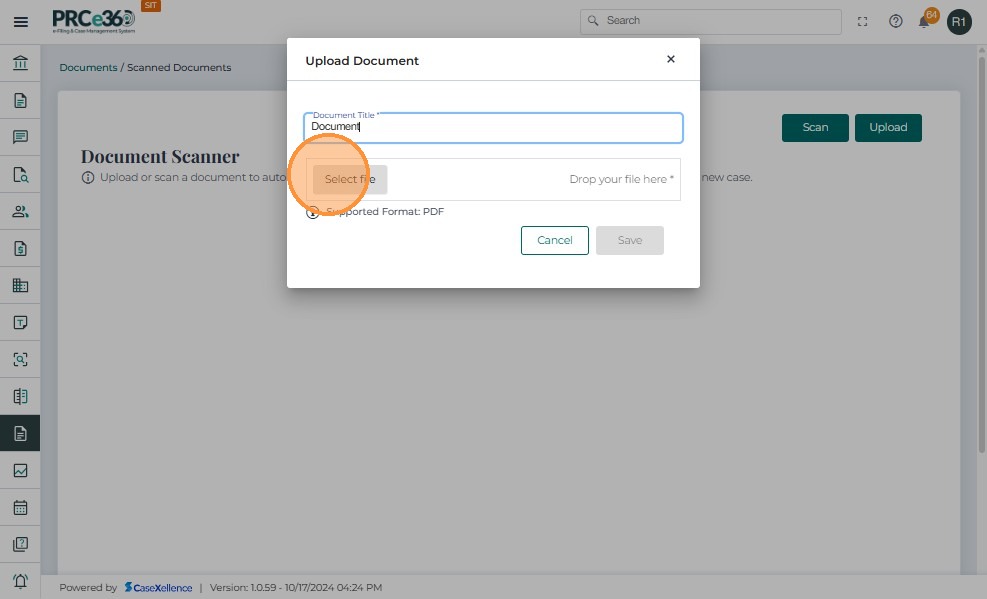
In the Upload Document window, enter the Document Title.
-
Click Select file and choose the PDF document to upload.
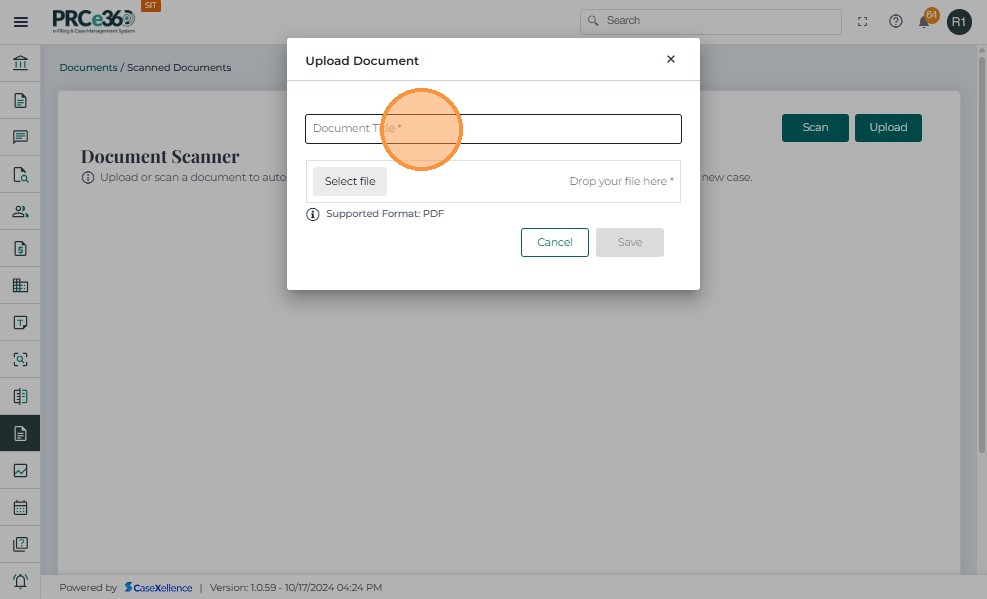
- Click Save to upload the document.
Step 6: Confirm Document Registration
-
Upon successful scanning and processing, the system registers the document automatically.
-
All metadata (Document ID, Case/Pre-Case ID, Title, Author, Date Received, and Company Name) is populated automatically if both the barcode and metadata were successfully read from the document's front page, or manually entered if the front page is missing either component.
-
The document becomes available in the system for authorized users and appears in search and filter results like electronically filed documents.
-
A confirmation message will be displayed indicating successful document registration.
Troubleshooting
Scanner Not Detected
Possible Causes:
- CaseXellence Scanning Agent is not running
- Scanner is not powered on or connected
- Scanner drivers are not installed
- Firewall or security software blocking the connection
Solution:
- Ensure the CaseXellence Scanning Agent is running on your device
- Verify scanner power and connection
- Install or update scanner drivers
- Check firewall settings and allow the scanning agent through
Barcode or Metadata Not Read from Front Page
Possible Causes:
- Document front page does not contain both barcode and metadata
- Barcode or metadata text is damaged, unclear, or not properly positioned on the front page
- Document is not properly positioned on scanner (front page not fully visible)
- Front page is not face-down on the scanner
- Barcode format is not supported
Solution:
- Ensure the document's front page contains both the barcode and all required metadata
- Verify the front page is clearly visible and all text is readable in the scanned image
- Reposition the document on the scanner with the front page face-down and try rescanning
- If the front page is missing either the barcode or metadata, you will need to enter the Document ID and all metadata manually
- Check that the front page is not damaged or obscured
Document Not Matching Docket
Solution:
- The document will be automatically filed to Unassigned Documents
- You can later assign it to the correct docket when identified
- Use the search function to locate the document in Unassigned Documents
Notes
- Supported upload format: PDF only
- CaseXellence Scanning Agent: Must be installed and running on your local device for scanner detection
- Front Page Requirements: For automatic processing, the document's front page must contain both a barcode and document metadata. Documents missing either component on the front page will require manual data entry.
- Permissions: Only users with appropriate access (Records Staff, COS Supervisor) can scan and view documents
- Unassigned Documents: Documents without matching dockets are automatically filed to Unassigned Documents for later assignment
- Searchability: Scanned documents are automatically indexed and searchable like electronically filed documents
- Metadata: For documents with both barcode and metadata on the front page, all information is automatically populated from the scanned front page. For documents missing either component, metadata must be entered manually during the scanning process
Related Guides
- Dashboard - Documents - View and manage scanned documents
- Document Filing Request - Learn about document filing processes
- Submit a New Docket - Create a new docket for scanned documents